ADVERTISEMENT
Mix the Wet Ingredients: In a separate, smaller bowl, beat 1 egg until it is well combined. Add the egg to the flour mixture along with ½ cup of cold water. The egg helps to bind the dough together and adds richness, while the water hydrates the flour to form a cohesive dough.
Combine to Form Dough: Stir the egg and water into the flour mixture until the dough begins to come together. You may need to use your hands to gently knead the dough just until it forms a ball. Avoid overworking the dough, as this can lead to a tough crust.
Step 3: Divide and Chill
Divide the Dough: Once the dough is formed, divide it into 4 equal portions. This recipe yields enough dough for 4 standard pie crusts, so you can use each portion for a single pie or freeze the extra dough for future use.
Chill the Dough: Wrap each portion of dough in plastic wrap and refrigerate for at least 30 minutes. Chilling the dough helps to solidify the fat, making it easier to roll out and ensuring a flakier texture.
Step 4: Roll Out the Dough
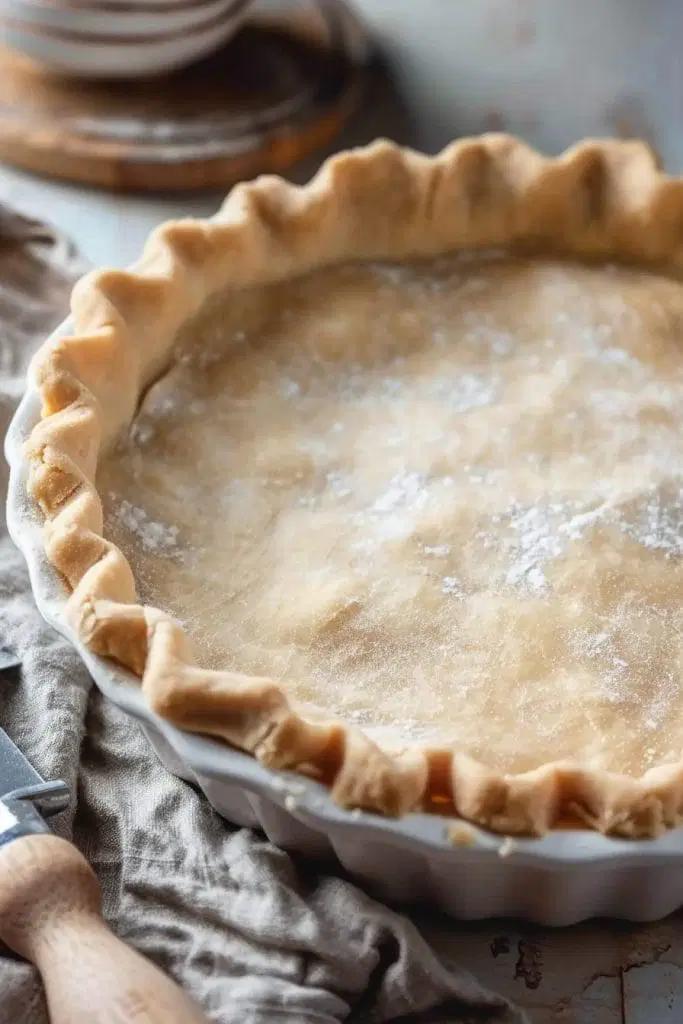
Prepare Your Workspace: Lightly flour your work surface and rolling pin to prevent sticking. Take one portion of chilled dough and roll it out to fit your pie pan. Aim for a thickness of about ⅛ inch to ¼ inch. If the dough cracks or breaks, simply patch it together with your fingers.
Transfer to Pie Pan: Carefully transfer the rolled-out dough to your pie pan. Gently press it into the bottom and sides of the pan, trimming any excess dough from the edges. For a classic pie look, you can crimp the edges with a fork or your fingers.
Pre-Bake or Fill: Depending on your pie recipe, you may need to pre-bake the crust. Follow your specific pie recipe’s instructions for baking times and temperatures. If you’re filling the crust with a raw filling, simply proceed with your pie recipe’s baking instructions.
Variations and Substitutions
Butter Substitute: If you prefer a richer flavor, you can substitute half of the shortening with unsalted butter. This will give your crust a more buttery taste while maintaining its flakiness.
Gluten-Free Option: For a gluten-free version, substitute the all-purpose flour with a gluten-free all-purpose flour blend. Be sure to check that the blend contains xanthan gum or guar gum, which helps to bind the dough.
Flavored Crust: For added flavor, you can incorporate herbs or spices into the dough. Try adding a teaspoon of dried thyme or rosemary for a savory pie crust, or a teaspoon of cinnamon for a sweet crust.
Conclusion
Grandma’s No-Fail Pie Crust is more than just a recipe; it’s a heartfelt tradition that transforms simple ingredients into a delicious, flaky crust. It’s a testament to the joy of baking, where each step connects you to the past and creates new memories with every pie you bake.
The simplicity of this recipe makes it accessible for both experienced bakers and those new to pie-making. Its versatility allows you to use it for a wide range of pies, from classic apple and pumpkin to savory chicken pot pie. Whether you’re celebrating a special occasion or just enjoying a cozy night in, this pie crust will elevate any pie to new heights.
So, roll up your sleeves, gather your ingredients, and dive into the comforting world of homemade pie crust. As the dough transforms into a golden, flaky masterpiece, you’ll experience the joy of creating something truly special. Enjoy the process, savor the results, and share the delicious fruits of your labor with those you love.
ADVERTISEMENT

