ADVERTISEMENT
Step 1: Prepare the Apples Chop your apples into medium chunks. It’s fine to use the cores and peels, as they add to the nutrient content and flavor of the vinegar. If you want a slightly different taste, consider mixing several types of apples.
Step 2: Sugar and Water Dissolve the sugar in water and pour this mixture over the apples in the jar until they are completely submerged. This sugar water will help convert the natural sugars in the apples into alcohol, which is a key step in creating vinegar.
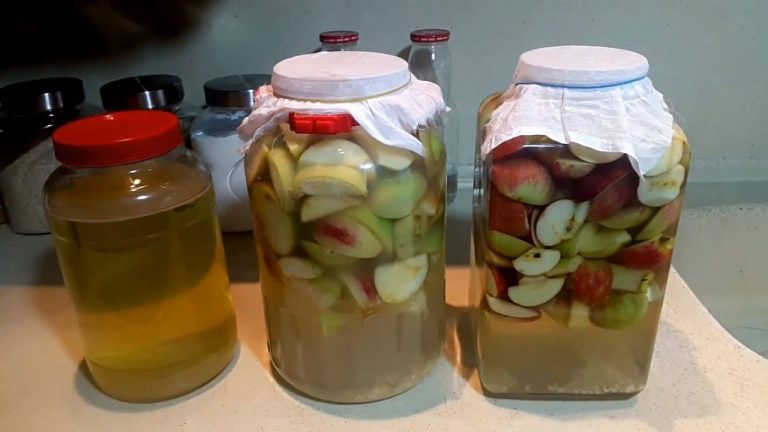
Step 3: Cover and Wait Place the cheesecloth or coffee filter over the jar’s opening and secure it with a rubber band or string. This allows the mixture to breathe and the natural wild yeasts in the air to do their work while keeping out insects and debris.
Step 4: Fermentation Store the jar in a dark, warm place for about 3 to 4 weeks. You can stir the mixture every few days to make sure the apples are decomposing properly and releasing their flavors.
Step 5: Straining After the initial fermentation period, you’ll notice the liquid has turned murky and the apples have settled. Strain out the solids and return the liquid to the jar for further fermentation.
Step 6: The Second Ferment Cover it again with the cloth, and let it sit for another 4 to 6 weeks, stirring occasionally. During this phase, the alcohol transforms into acetic acid, which gives the vinegar its tangy flavor.
Step 7: Taste and Store Taste your vinegar periodically. Once it reaches the acidity and flavor you like, transfer it to a bottle and seal it. Your homemade apple vinegar can be stored at room temperature and used within a year.
Conclusion
Making your own apple vinegar is a rewarding process that results in a product far superior to most store-bought varieties. Use your homemade vinegar in dressings, marinades, or as a health tonic to enjoy its many benefits. Happy fermenting!
ADVERTISEMENT

